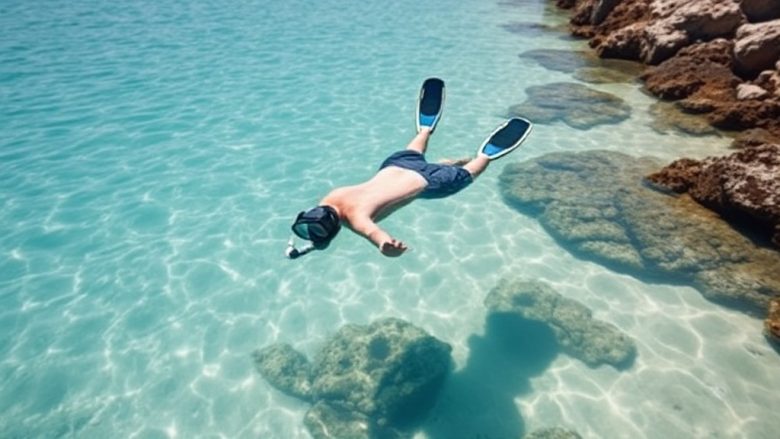
The first breath through a snorkel is strange. You put your face in the water, the world goes quiet, and your body sends a small alarm signal that says you should not be breathing right now. Then you exhale, the tube clears with a soft puff, and you realise you are fine. That moment is the whole sport in miniature. This beginner guide to snorkelling is built around it, because snorkelling is a skill you learn in stages, not a gadget you buy and immediately master.
If you can swim a few lengths without touching the bottom, you already have the fitness for a calm first session. What you need is a sequence: get the gear to fit, learn to breathe, learn to float, learn to move, then take it all into open water. Each stage takes minutes, not weeks. Most people can work through the whole progression in an afternoon and a following morning.
Stage 1: Get the Gear to Fit Before You Get Wet
Bad fit ruins more first snorkels than bad swimming. A leaking mask means you spend the whole session clearing water instead of looking at anything, and a mask that presses too hard leaves you with a headache before you have seen a single fish.
Start with the mask. Rest it on your face without pulling the strap over your head, breathe in gently through your nose, and let go. A well-fitting mask stays stuck to your face on its own, held by suction. If it drops immediately, try a different shape. Faces vary, and no single mask suits everyone. Only after it passes this test should you tighten the strap, and even then, snug is enough. A strap pulled tight is a strap that leaks and hurts.
Masks with a separate nose pocket matter because you need to pinch your nose to equalise pressure as you go deeper. A single-lens mask gives a wide view; a two-lens mask lets you fit prescription lenses later if you wear glasses. Either works. What does not work is a cheap mask that fogs constantly and a snorkel attached with a clip that catches your hair.
The snorkel itself should be simple. A basic J-shaped tube with a soft mouthpiece beats a complicated valve system for a beginner, because there is less to go wrong and less to clean. Attach it to the mask strap on your left side if you are right-handed, so it sits out of the way when you are not using it.
Fins should be snug but not tight. Your toes should touch the end without curling. Too loose and they rub; too tight and your feet cramp within ten minutes. If you are buying rather than renting, full-foot fins are lighter for travel and open-heel fins with a strap suit thicker neoprene socks in colder water.
Finally, a rash vest or thin wetsuit does two jobs: it stops sunburn on your back and it keeps you warmer than you expect, because you lose heat fast when you are floating still. In tropical water a 1mm top is plenty. In temperate water you will want more.
Stage 2: Learn to Breathe Through the Snorkel on Dry Land
Before you put your face in the water, practise breathing through the snorkel while standing in the shallow end. Put the mouthpiece in, seal your lips around it, and breathe in and out through your mouth only. Your nose is covered by the mask, so there is no temptation to cheat.
Do this for a minute. Slow, steady breaths. Then practise the clearing breath, which is the single most useful skill in snorkelling. Take a normal breath, then exhale sharply and fully through the snorkel as if you were blowing out a candle. That blast of air pushes any water out of the tube. If a little water remains, a second short puff clears it. You will use this every time you surface, and once it becomes automatic, you stop worrying about water getting in.
Next, put your face in the water with the snorkel in your mouth and breathe. This is where the alarm signal usually fires. Your instinct says breathe through your nose, which is blocked, so you feel a flash of panic. The fix is to keep your mouth slightly open and breathe deliberately through the tube. Do it in the shallow end where you can stand up at any moment. Ten or fifteen slow breaths is usually enough for the reflex to settle.
If you wear contact lenses, keep them in; a mask with plain glass is fine for surface snorkelling. If you wear glasses and cannot see without them, consider a prescription mask or daily disposable lenses for the trip. Squinting at blurry shapes is not the experience you came for.
Stage 3: Float Face-Down and Trust the Water
Floating is where beginners waste energy. They kick constantly to stay up, then wonder why they are exhausted after twenty minutes. The truth is that a relaxed body floats, and a snorkeller spends most of the time face-down, which is the most buoyant position of all.
In the pool, put your face in the water, let your arms rest by your sides or lightly forward, and just lie there. Breathe through the snorkel. Notice that you are not sinking. Your lungs are a float. If you tend to float legs-down, which many people do, a thin wetsuit top adds a little lift and makes horizontal floating much easier.
Practise clearing your mask while you are floating. Lift the seal slightly at the top, let a little water in, then press the top of the mask against your forehead and exhale gently through your nose. The air pushes the water out through the bottom. This is a calm, small movement, not a dramatic one. Being able to clear a mask without surfacing removes most of the fear from deeper water.
Also practise rolling onto your back. From face-down, turn your head and shoulders, let your body follow, and float on your back with the snorkel mouthpiece still in your mouth or removed. This is your rest position. Knowing you can reach it in two seconds makes everything else feel safer.
Stage 4: Finning That Moves You Without Draining You
Fins are not for splashing. They are for slow, smooth propulsion, and the stroke is almost all from the hip, not the knee. Think of your leg as a single piece from hip to toe, with a slight bend at the knee on the recovery. A small, steady flutter beats a big, fast one every time.
Keep your ankles loose and your toes pointed. A stiff ankle wastes effort and makes your fins slap the water. A relaxed ankle lets the fin blade flex, which is where the push comes from. If your legs start to burn, slow down. Snorkelling is a glide sport, not a race.
For surface swimming, keep your arms still and streamlined, either by your sides or one forward. Extra arm movement disturbs the water and scares fish. When you want to turn, use a gentle scissor kick and lean your body rather than paddling with your hands.
Practise duck-diving in the pool if you want to look under ledges later. Take a breath, point your head down, lift one fin out of the water, and let your weight carry you under. Equalise your ears by pinching your nose through the mask and blowing gently. If your ears hurt, stop going deeper. Pain is not something to push through; it is a signal to come up a metre.
Stage 5: Your First Open-Water Session, Step by Step
Open water adds current, chop, depth and things that move. None of it is a problem if you enter with a plan and pick easy conditions.
Choose a calm day, a sheltered bay, and a spot where you can stand up in waist-deep water. Go with someone. Snorkelling alone removes your safety net, and a buddy is also more fun. Check the tide and the forecast, and ask locally about currents and boat traffic. A shore with a lifeguard or a busy snorkelling area is a good place to start.
Walk in backwards with your fins on, or put your fins on at the water’s edge. Wade to waist depth, put your mask on, spit or use a little defogger on the inside of the lens, rinse it once, and settle the mask on your face. Then put the snorkel in and lie face-down.
Float for a minute before you go anywhere. Breathe. Check that your mask is not leaking and your snorkel is clear. Then start a slow fin. Stay close to shore for the first ten minutes. Look down, look around, and get used to the fact that the bottom is further away than it was in the pool. It usually stops feeling strange within a few minutes.
Set a few habits that will serve you for years. Look up every so often to check your position and distance from shore. Never turn your back on the sea without checking what is behind you. Keep your hands to yourself around coral and rocks; touching damages the reef and can sting or cut you. Do not stand on coral, even if you are tired. Float on your back instead.
If you feel cold, tired or uneasy, end the session. A short good session beats a long bad one, and you can always go back in tomorrow. The aim of your first open-water snorkel is not to see everything. It is to finish calm, breathing easily, already looking forward to the next one.
Common Beginner Worries
What if water gets in my snorkel?
It will, and it does not matter. Exhale sharply through the tube and the water shoots out. If the tube is full, surface, take the mouthpiece out, tip the water out, and start again. This is a normal part of snorkelling, not a failure.
What if my mask keeps fogging?
New masks often have a residue from manufacturing. Clean the inside of the lens with a little toothpaste or a proper defogger, rinse, and avoid touching the inside of the glass with your fingers. Fogging is usually caused by a dirty lens, warm breath, or a mask that does not fit. Fix the fit first, then the lens.
What if I panic when I cannot see the bottom?
Stay in shallower water until you are comfortable, then move out a few metres at a time. Practise your rest position on your back so you always know you can breathe and float. Panic fades with familiarity, and familiarity comes from short, repeated sessions rather than one long push.
Do I need a wetsuit?
In warm tropical water, a rash vest is often enough. In cooler water, a 3mm shortie or full suit keeps you warm and adds buoyancy. Being cold makes everything harder, so if you are unsure, wear more than you think you need.
How long should a first session last?
Twenty to forty minutes is plenty. Your body loses heat in water even when it feels warm, and tired legs make poor decisions. Finish while you are still enjoying it.